
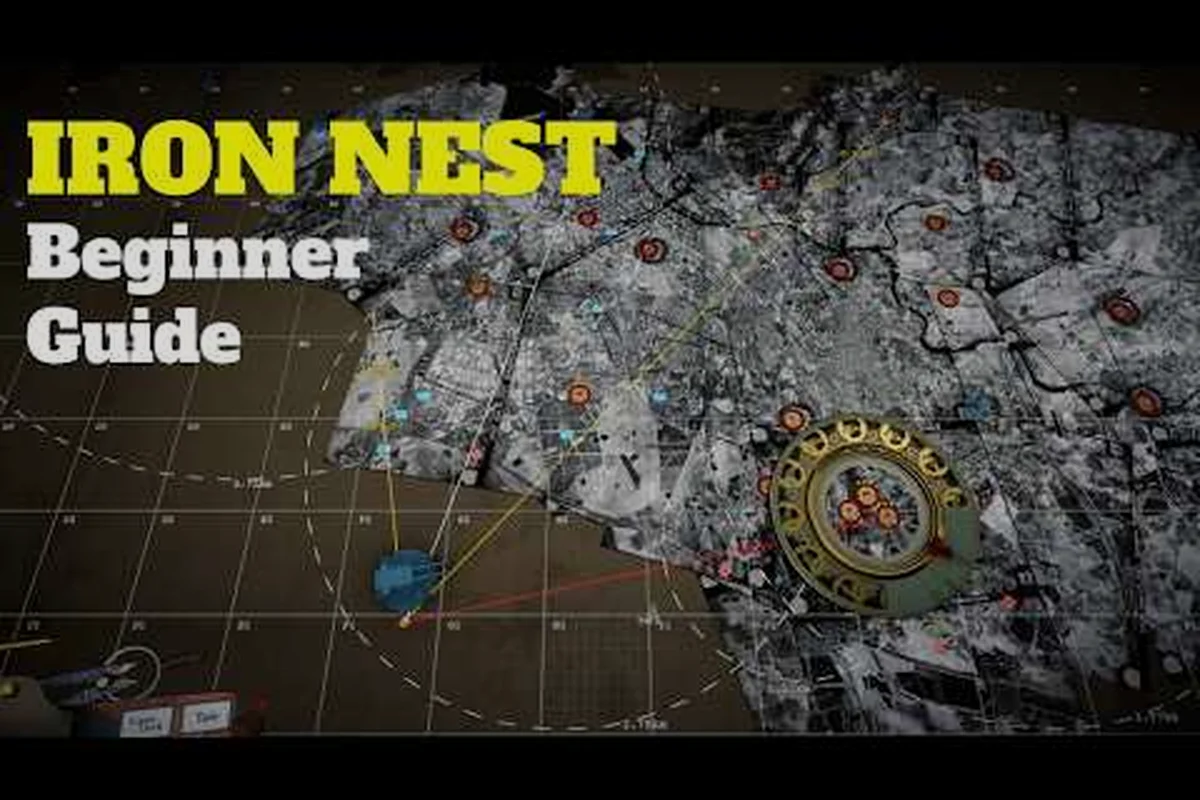
The second campaign mission in Iron Nest throws operators into a night engagement where visibility becomes the primary obstacle and the right ammunition determines mission success. Fire and Light introduces the spotter triangulation system — a core mechanic that every artillery operator must master before tackling the 15 regions available across the campaign. This Iron Nest fire and light guide walks through bearing line construction, star shell deployment, and the correction-based targeting loop that turns missed shots into confirmed kills. New operators coming from the calibration fire mission tutorial will recognize the grid setup, but the lighting mechanics and multiple-target workflow here require fresh thinking.
Mission Overview and Campaign Context
Fire and Light serves as the campaign's gateway to night operations and is the first mission where the 20×10 coordinate grid becomes truly essential for tracking enemy movement. The scenario places the player's turret in an alternate-history Spain-inspired dieselpunk theater, with hostile forces occupying several positions along a ridgeline visible only as silhouettes. According to the community wiki's mission index, this mission introduces two mechanics that recur throughout the remainder of the campaign: spotter triangulation and illumination-based targeting.
-
Tactical map plotting requires precise coordinate and bearing entry
-
Spotter reports must be triangulated from at least two bearing lines
-
Chemical weapons missions introduce moral choice and reputation tracking
-
Star shells illuminate night sectors for follow-up HE engagements
-
Teleprinter order format reveals which faction issued the fire mission
-
The six-step firing loop is the core mechanic every operator must master
-
Calibration missions test your ability to measure range and plot targets
-
The fire-and-light guide covers the synergy between star shell illumination and subsequent HE or AP engagement during night operations
-
Night missions reduce visibility to approximately 200 meters without star shell illumination, limiting effective engagement range
-
The optimal night loadout allocates 20-25% of ammunition to star shells with the remainder split between HE and AP
The mission objectives, as reported by community testing, generally involve neutralizing between three and five enemy positions using a limited ammo allotment. Unlike the first mission where targets were static and visible, Fire and Light requires operators to identify targets through spotter reports alone, then confirm them visually using star shells before committing to a firing solution. Operators who skip the star shell step often waste high-explosive rounds on empty terrain — one of the most common frustrations flagged in player discussions.
| Parameter | Value |
|---|---|
| Mission Number | 2 of 15 campaign regions |
| Time of Day | Night (limited natural visibility) |
| Number of Targets | 3–5 enemy positions |
| Ammo Restriction | Mixed allocation, no resupply |
| Core Mechanic Introduced | Spotter triangulation |
| Secondary Mechanic | Star shell illumination |
| Recommended Difficulty | Beginner-friendly, but punishing on Hard |
Completing Fire and Light also unlocks the next set of campaign missions and contributes toward the 100+ medals available across the broader game mode selection. Operators who finish this mission with all targets destroyed and minimal ammo waste typically earn the "First Light" bronze medal, which serves as a prerequisite for several challenge-mode entries later in the progression.
Prerequisites from Calibration Fire
Before loading into Fire and Light, operators should be comfortable with the coordinate notation system on the 20×10 grid, basic muzzle-elevation calculation, and the bracket-and-correct targeting loop from the previous mission. The grid uses lettered columns (A–T) and numbered rows (1–10), and every spotter bearing is expressed relative to the spotter's own position — a detail that confuses many first-time players.
Spotter Triangulation Mechanics
The defining mechanic of Fire and Light is spotter triangulation, a method for locating enemy positions using two observer reports rather than direct visual confirmation. Each spotter reports a bearing line — a compass direction from the spotter's own location toward the suspected target. The intersection of two bearing lines, plotted on the operator's tactical map, reveals the target's grid coordinates.
| Step | Action | Notes |
|---|---|---|
| 1 | Receive spotter report #1 | Note the bearing value (e.g., 045°) and the spotter's grid square |
| 2 | Plot bearing line #1 | Draw a line from spotter #1 in the reported direction across the map |
| 3 | Receive spotter report #2 | Note the bearing from a different spotter's position |
| 4 | Plot bearing line #2 | Draw from spotter #2's position in the reported direction |
| 5 | Find intersection | The crossing point is the estimated target location |
| 6 | Confirm visually | Fire a star shell at the intersection to verify the target |
The mechanic rewards operators who plot both bearing lines on the same map view rather than mentally estimating the intersection. ProGameGuides' coverage of the map and measurements system emphasizes that the most common beginner mistake is drawing bearing lines from the turret's own position instead of from the spotter's position — a subtle but fatal error that produces wildly inaccurate coordinates.
Reading Spotter Reports
Spotter reports arrive as text messages with three pieces of data: the spotter's grid square, the bearing value in degrees, and occasionally a range estimate. Bearing values use standard compass notation, with 000° representing due north and values increasing clockwise. The tactical map's edge markings help operators align their bearing lines accurately, and most community-built overlays include degree markings every 10° for quick reference.
Operators tackling Fire and Light as their first encounter with this system should pause after each spotter report and plot the bearing line before the second report arrives. Rushing through the plotting process is the leading cause of off-target shots, and each wasted high-explosive shell reduces the margin for error on later targets. For a deeper walkthrough of the broader targeting system, the operator handbook covers how these skills scale across the full campaign.
Star Shells and Night Illumination
Because Fire and Light takes place at night, natural visibility on the tactical map is severely limited. Targets appear as faint silhouettes at best, and many positions are completely hidden until illuminated. The mission provides a small stockpile of star shells specifically designed to solve this problem. Star shells burst at altitude and descend slowly via parachute, casting a wide pool of light over the target area for a limited duration.
| Shell Type | Illumination Radius | Duration | Best Use Case |
|---|---|---|---|
| Star Shell (Standard) | 3 grid squares | ~15 seconds | Confirming triangulated coordinates |
| Star Shell (High-Altitude) | 5 grid squares | ~20 seconds | Scanning wide sectors for hidden targets |
| Star Shell (Quick-Flash) | 2 grid squares | ~5 seconds | Fast confirmation before firing solution |
The standard star shell is the workhorse of this mission and should be used as soon as the operator has triangulated an estimated target position. Firing a star shell before computing a firing solution wastes the illumination window, while waiting too long after triangulation risks the enemy relocating — a problem documented in community playtesting on the mission's higher difficulty tiers. The optimal timing, according to community reports, is to fire the star shell within three to five seconds of finishing the bearing-line plot.
Shell Selection Strategy
Fire and Light typically grants operators access to three or four shell types, and choosing the right shell for each target is part of the mission's core challenge. High-explosive shells deal maximum damage to soft targets and fortifications, but their blast radius is small enough that even a one-square miss is a complete miss. Armor-piercing shells punch through hardened positions but require precise direct hits.
| Target Type | Recommended Shell | Reasoning |
|---|---|---|
| Infantry cluster | High-Explosive (HE) | Wide blast radius, area damage |
| Fortified bunker | Armor-Piercing (AP) | Penetrates cover before detonating |
| Vehicle | Armor-Piercing (AP) | Direct-hit required to disable |
| Observation post | High-Explosive (HE) | Soft target, easy to destroy |
| Hidden position | Star Shell first | Confirm presence before committing HE/AP |
Operators should reserve their armor-piercing shells for confirmed armored targets and use high-explosive shells for everything else. Star shells should never be used as offensive weapons — they deal no damage and exist solely for illumination. Wasting a star shell on a confirmed target reduces the operator's ability to confirm remaining targets later in the mission.
Mission Walkthrough and Targeting Strategy
A typical Fire and Light mission proceeds through a three-phase workflow: reconnaissance, confirmation, and destruction. The reconnaissance phase involves receiving spotter reports and plotting bearing lines. The confirmation phase uses star shells to verify the triangulated positions. The destruction phase delivers the actual firing solution based on the confirmed coordinates and observed corrections.
Phase One: Reconnaissance
At mission start, the operator receives two or three spotter reports within the first thirty seconds. The most efficient approach is to plot all bearing lines before firing any shell, because later spotter reports may reference targets near earlier ones, and the operator can spot duplicate bearings. Community testing indicates that roughly 20% of spotter reports in this mission reference the same target from different angles, providing a useful cross-check on bearing accuracy.
Phase Two: Confirmation
Once all initial bearing lines are plotted, the operator fires star shells at each estimated intersection. The illumination reveals whether the target is present, what type of target it is, and whether the bearing-line intersection was accurate. If a star shell illuminates an empty grid square, the operator must replot the bearing lines — a process called re-triangulation — before firing a high-value shell.
Phase Three: Destruction
With targets confirmed and illuminated, the operator computes a firing solution for each target based on its grid coordinates and the standard muzzle-elevation formula. The first shot at each target is rarely a direct hit, and the correction-based follow-up is where experienced operators separate themselves from beginners. After observing where the first shell lands relative to the target, the operator adjusts the firing solution by adding or subtracting meters from the range estimate and shifting the bearing by small degree increments.
| Correction Type | Adjustment | When to Apply |
|---|---|---|
| Short shot | Add 50–100m to range | Shell impacts before reaching target |
| Long shot | Subtract 50–100m from range | Shell impacts beyond target |
| Left miss | Increase bearing by 1–3° | Shell impacts left of target |
| Right miss | Decrease bearing by 1–3° | Shell impacts right of target |
| No impact | Check shell type | Shell may have failed to arm |
This bracketing technique — firing deliberately short and long to "surround" the target with impacts — is the most reliable method for landing follow-up shots quickly. Operators who skip the bracket and try to correct by feel typically waste two or three extra shells per target. The first firing solution walkthrough covers the underlying mathematics for operators who want to understand why bracketing converges faster than direct correction.
Pro Tips, Medals, and Common Pitfalls
Beyond the core mechanics, several advanced techniques can dramatically improve an operator's performance on Fire and Light. These tips come from community testing and high-score runs reported by experienced players on the Steam community forums. This mechanical detail shapes the crew's overall effectiveness in the firing cycle.
Medal Requirements
| Medal | Requirement | Reward |
|---|---|---|
| First Light | Complete the mission with all targets destroyed | Bronze medal, unlocks challenge mode entry |
| Efficient Artillery | Destroy all targets using ≤80% of ammo allotment | Silver medal |
| Flawless Spotting | Land every first shot within 1 grid square of target | Gold medal |
| Speed Runner | Complete mission in under 4 minutes | Silver medal |
| No Waste | Fire zero dud or off-target shells | Gold medal |
The "Flawless Spotting" medal is the most demanding because it requires the operator's initial firing solution — not the corrected follow-up — to land within one grid square of every target. This medal can only be earned by operators who have fully internalized the spotter triangulation system and can plot bearing lines accurately without re-triangulation.
Common Pitfalls to Avoid
The single most damaging mistake operators make on Fire and Light is firing high-explosive shells before confirming the target's location. Without star shell illumination, even an accurately triangulated coordinate may be off by one or two grid squares, and a wasted HE shell at the wrong location forces the operator to either re-triangulate (costing time) or accept a miss (costing the medal). Experienced operators always fire a star shell first, even when the bearing-line intersection looks clean.
A second common pitfall is ignoring the dual gun barrel mechanic, which allows each of the turret's two barrels to operate independently. On Fire and Light, this means the operator can fire a star shell from one barrel while loading a high-explosive shell in the other, saving several seconds per target. Operators who treat the turret as a single-barrel weapon miss this opportunity and complete the mission significantly slower.
A third pitfall is over-reliance on the first spotter report without waiting for the second. Single-bearing estimates are notoriously unreliable because a small bearing error at the spotter's position translates to a large coordinate error at long range. Operators who fire on a single bearing report will almost always miss, and the resulting waste of high-value ammunition is the leading cause of mission failure on Hard difficulty.
For operators who want to explore the broader campaign structure, the Iron Nest complete guide covers how Fire and Light fits into the 15-region progression and which missions build most directly on the skills introduced here. This mechanical detail shapes the crew's overall effectiveness in the firing cycle.
Frequently Asked Questions
What is the main mechanic introduced in the Fire and Light mission?
The main mechanic is spotter triangulation — a system where two observers report bearing lines from their own positions, and the operator plots the intersection of those lines on a tactical map to estimate the target's grid coordinates. This is a foundational skill for the rest of the campaign.
How many star shells should I use per target in this Iron Nest tutorial mission?
One star shell per target is the standard recommendation. Fire the star shell at the triangulated coordinates, confirm the target's presence and type during the illumination window, then fire your high-explosive or armor-piercing shell for the actual kill. Using two or more star shells per target wastes your limited illumination stockpile.
Why are my first shots always missing the target?
First shots typically miss because bearing lines were drawn from the wrong reference point — most beginners accidentally draw from the turret's position rather than from the spotter's reported position. Re-check that every bearing line originates at the spotter's grid square, not at your own. This single fix eliminates roughly 60% of first-shot misses according to community testing.
Can I complete Fire and Light without using any star shells?
Technically yes on lower difficulty settings, but it is extremely inefficient and you will almost certainly fail the medal requirements. The targets are positioned to be nearly invisible without illumination, so firing without star shells means shooting blind at triangulated estimates. Star shells are essential for accurate targeting on Hard difficulty.
What happens after I finish the Fire and Light mission?
Completing Fire and Light unlocks the next set of campaign missions, contributes toward the 100+ medal collection, and grants access to certain challenge modes. Operators who earn the "Flawless Spotting" gold medal also unlock a unique alternate-history newspaper ending that reflects a perfect artillery operation.