
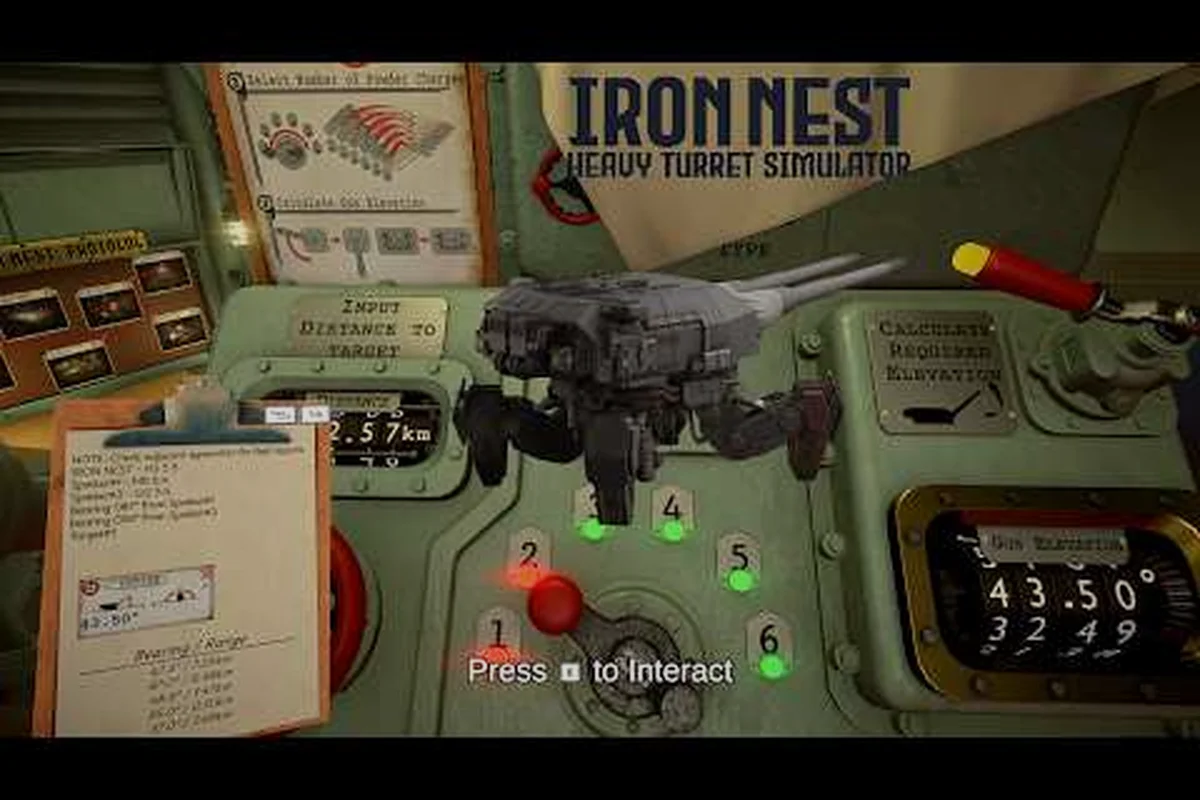
The tactical map table sits at the center of every successful fire mission in the game, yet most new operators underestimate how quickly their spotter workflow decides whether a salvo lands on target or wastes three powder charges on empty terrain. Plotting coordinates correctly, confirming bearings with a second spotter, and feeding reliable data back through the teleprinter determines whether the next round is a confirmed kill or a frustrating correction. This tactical map guide breaks down the exact sequence the game expects from a competent spotter, so you can stop guessing elevation values and start dialing in heavy turret barrages with confidence.
Reading the Tactical Map Table on First Contact
The first time you walk up to the tactical map, the layout can look overwhelming: concentric grid rings, hand-drawn terrain sketches, a grease pencil, and a stack of unused firing cards. Treat the table as a fixed reference rather than a decoration, because the spotter who ignores it usually ends up dialing random bearings and watching shells impact two grid squares off target. Before you touch the elevation dial, take thirty seconds to identify three landmarks on the map — your own turret position, the observed enemy activity, and the high command reference point printed in the corner of the sheet.
-
Star shells illuminate night sectors for follow-up HE engagements
-
Teleprinter order format reveals which faction issued the fire mission
-
The six-step firing loop is the core mechanic every operator must master
-
Calibration missions test your ability to measure range and plot targets
-
Powder charge selection affects range, arc, and shell travel time
-
Tactical map plotting requires precise coordinate and bearing entry
-
Spotter reports must be triangulated from at least two bearing lines
| Map Element | What It Represents | Operator Action |
|---|---|---|
| Concentric rings | Range bands from turret position | Match ring count to powder charge (1-6) |
| Crosshair grid | Bearing / elevation coordinate grid | Plot observer-reported coordinates here |
| Grease pencil marks | Previous spotter corrections | Wipe clean only between full missions |
| Photo overlay | Confirmed enemy positions | Annotate with call sign and timestamp |
Once those landmarks are locked into your visual memory, the coordinate system stops feeling abstract. The Iron Nest map shows distance as ring count from the muzzle and direction as angular bearing, which means every observer report can be traced back to one specific intersection on the table. If you want a deeper tour of the physical layout, the tactical map overview walks through every hardware component of the plotting station in detail.
Spotter Mechanics and the Reporting Workflow
The spotter role in the game mirrors real-world artillery forward observation, but condensed into a single operator loop that runs from detection to fire-for-effect in roughly forty seconds. A second player can take the spotter seat, and on the hardest challenge modes, you will want one. Even playing solo, the game still surfaces observer calls through the teleprinter, so understanding the workflow teaches you to read incoming intel and reply with corrections that the ballistic calculator can parse.
The standard spotter workflow follows four beats — locate the target with binoculars, plot its position on the tactical map with the pencil tool, call the coordinates to the fire direction center, and confirm impact with a second observation — and each step has a strict time budget that keeps the overall mission on schedule.
-
Detect — Identify muzzle flash, vehicle silhouette, or tracer origin on the visible terrain.
-
Estimate — Match the contact to a grid intersection using the spotting scope reticle. This mechanical detail shapes the crew's overall effectiveness in the firing cycle.
-
Transmit — Send the coordinate, the target description, and the priority code through the teleprinter channel. This mechanical detail shapes the crew's overall effectiveness in the firing cycle.
-
Adjust — Read the bracketing impact deviation ("drop 200, right 100") and re-fire with corrected values. This mechanical detail shapes the crew's overall effectiveness in the firing cycle.
Teleprinter Coordination
The teleprinter prints incoming reports on a continuous paper roll, and operators quickly learn to scan the latest three lines before committing elevation. A useful habit is to highlight bracketing corrections — when the report says "drop 100, left 50," the next shot should subtract one ring of fall and rotate traverse toward the indicated side. Many players miss that the first correction after a wild miss is rarely the final one, so plan on at least three adjustment rounds before declaring fire-for-effect, especially because random dispersion still scatters shells within one to two grid squares even on a perfect solution.
Reading Bracketing Corrections
Spotter shorthand uses directional terms rather than full coordinates, and that shorthand is what feeds the ballistic calculator through the firing card. Translate verbal calls mentally into the four quadrant adjustments that the calculator expects, then double-check whether the correction makes sense against the previous shot. If the previous impact was 300 meters short and the spotter says "drop 50," that means add one ring of elevation for the next round, which corresponds to roughly a charge-number increase if the range band is close.
Coordinate Systems and Grid Plotting
Every coordinate in the game uses a simple bearing-plus-ring format, and once you internalize it, the rest of the spotter workflow becomes mechanical. The grid is divided into twelve sectors (clock-face style from the turret muzzle) and six range rings, which together give seventy-two unique fire sectors per charge band. Skilled spotters reduce this further by always speaking in clock direction first ("target bearing three," meaning 030 from muzzle north) and then the range ring second.
| Charge # | Effective Range | Typical Target Type | Recommended Correction Cycle |
|---|---|---|---|
| Charge 1 | Near ring (0-500m) | Close infantry, light trucks | Single round, minimal adjust |
| Charge 2 | 500m-1.2km | Vehicles in defilade, mg nests | Two-round bracket |
| Charge 3 | 1.2km-2km | Armored cars, command half-tracks | Three-round bracket + observer |
| Charge 4 | 2km-3km | Field guns, supply convoys | Three-round bracket, observer required |
| Charge 5 | 3km-4.5km | Bunkers, supply depots | Four-round bracket, sustained spotter |
| Charge 6 | 4.5km+ | Strategic targets beyond horizon | Sustained corrections, multiple rounds |
Quadrant Labels and Clock-Face Convention
Operators who struggle usually do so because they try to read the grid as Cartesian coordinates, when the game actually expresses bearing in clock-face degrees. Twelve o'clock points straight up the map sheet, six o'clock points down, and each hour represents thirty degrees of traverse. This convention is the same as a real gun dial, so adopting it early builds muscle memory that pays off across every challenge mode. If reading the grid itself feels foreign, the coordinate system guide covers notation, plot reading, and grid overlays in more depth.
Digital vs. Physical Map Marking
The map table accepts both digital annotations (typed on a side terminal) and physical grease pencil marks, and experienced teams use both layers for different purposes. Digital marks persist across missions and are searchable, which makes them ideal for confirmed kill zones and hidden enemy spawn points. Physical pencil marks are faster for in-mission corrections and can be wiped between rounds without polluting the long-term record. Mixing the two is acceptable as long as you keep them visually separated — for example, blue pencil for live corrections and red pencil for confirmed dead zones.
Triangulation: Pinpointing Targets With Two Observers
When a single spotter cannot see the target, or when an impact falls in unobserved terrain, triangulation becomes the backup plan. The game implements triangulation by accepting bearing reports from two separate observer positions — one can be the player turret itself, and the other an allied AI spotting team on a flank. Two intersecting bearings produce a single coordinate, and that coordinate is what the ballistic calculator resolves into elevation and traverse.
The math is simple in principle: draw line A from observer 1 along their reported bearing, draw line B from observer 2 along their reported bearing, and the intersection is the target. In practice, observer error of three to five degrees can shift that intersection by one full grid square at three-kilometer range, which is why triangulation calls should always be followed by a bracketing pattern rather than a single fire-for-effect shot.
Two-Spotter Method
Position your second observer on a clear flank with a clean line of sight to the suspected target, then have both observers call bearings simultaneously. The reported bearings should differ by at least thirty degrees for the intersection to be accurate; if the bearings are too close, the resulting coordinate will be extremely long and unreliable. Always confirm triangulation results with a spotting round before committing a full salvo, because the cost of correcting a bad solution rises sharply past charge three.
Adjusting for Drift and Observer Fatigue
After several minutes of continuous observation, the spotter's eye begins to drift, especially when scanning near the horizon line where atmospheric haze softens target edges. Compensate by rotating which observer reports primary every few minutes, and by sanity-checking every third call against the previous two reports. If three sequential bearings drift in the same direction by similar amounts, the target is probably moving rather than your eye playing tricks, so adjust the predicted coordinate forward along the line of motion rather than re-zeroing on the most recent report.
Common Spotter Errors and Verification Loops
Even veteran operators fall into patterns that cost missions, and recognizing those patterns early is the difference between a clean challenge run and a frustrating restarts session. The spotter guide portion of the table is built around verification loops — short habit checks that catch errors before they cost a powder charge.
| Error Type | Symptom | Verification Fix |
|---|---|---|
| Misread clock bearing | Shots consistently land 90° off target | Recalibrate muzzle north each mission |
| Range ring confusion | Impacts always 500m short | Cross-reference charge table before firing |
| Sign flip on elevation | First correction overshoots, second under | Always re-zero elevation between charges |
| Stale target mark | Firing into cleared terrain | Wipe physical marks between rounds |
| Teleprinter lag | Corrections arrive after re-fire | Pause two seconds between report and shot |
Building Personal Verification Habits
The fastest path to consistent accuracy is a five-second mental checklist before every fire key press: confirm bearing, confirm charge, confirm elevation sign, confirm target is still alive, and confirm spotter report is less than thirty seconds old. Skipping any one of these is the most common cause of wasted charges in challenge modes, especially in modes that score you on shells fired per kill rather than time. For a broader mission-by-mission walkthrough that integrates this checklist with the ballistic calculator, the step-by-step walkthrough is a useful companion read.
When you combine that checklist with the triangulation method above, your spotting accuracy should climb from roughly fifty percent first-shot hits to ninety percent within two corrections. That jump is what separates a casual operator from one who can clear the challenge mode leaderboard, because the scoring rewards tight correction loops rather than raw firing speed. The official Steam page lists the community-reported median for challenge completion as hovering around thirty shells per kill, so any operator pushing under twenty is well ahead of the curve, which according to player benchmarks is rare below rank fifty.
Advanced Layers: Layered Maps and Persistent Intel
Once the basic spotter loop feels natural, the next skill is building persistent intel layers that survive across missions. The game's map table supports up to six annotation layers, and experienced teams reserve specific layers for specific intelligence types — one for confirmed enemy spawns, one for high-value targets, one for safe corridors, and so on. Discipline around layer naming pays off when a mission briefing references older data and you need to recall whether a marked position was a sighting from this morning or three sessions ago.
Layered intel changes how you read the Iron Nest map during longer campaigns, because the table becomes a living dossier rather than a static reference. Treat every confirmed kill as a layer entry with a timestamp, and revisit older layers during pre-mission briefings to predict where enemies are likely to reposition. This kind of meta-map reading is what the higher difficulty challenge modes quietly reward, and it is also how the most consistent players on the leaderboard maintain accuracy even when the in-game weather shifts visibility between rounds.
If you enjoy the meta-game side of intel layering, the complete guide ties map reading to the broader ammunition, elevation, and firing-card decision tree for full-mission optimization. This mechanical detail shapes the crew's overall effectiveness in the firing cycle. Structured practice produces measurable improvement faster than trial-and-error play.
Frequently Asked Questions
What is the fastest way to learn the tactical map in the game?
Start every mission by identifying three landmarks on the map table — your turret, the high command reference point, and a visible enemy zone — then run the spotter workflow against those landmarks for the first five rounds. Once you can map any incoming teleprinter report to a grid intersection within ten seconds, you are operating at challenge-mode baseline accuracy.
How do I read clock-face bearings on the Iron Nest map?
Treat twelve o'clock as straight up the map sheet, then read each hour as thirty degrees of traverse from muzzle north. Always speak the hour first and the ring second when reporting targets, because that ordering matches what the ballistic calculator parses from the firing card input.
Can one player handle the spotter guide workflow alone on the game?
Yes, but only on the easier difficulty bands. The teleprinter still surfaces observer calls in solo play, and experienced solo operators run the loop in roughly forty seconds. Above difficulty seven, bring a second human observer because single-observer error rates climb past twenty percent at three-kilometer range.
Why do my first-round corrections always overshoot?
Sign-flip on elevation is the most common culprit. After firing on charge three and deciding to drop one ring for charge four, reverse the sign on every subsequent correction until you recenter. A five-second mental sign-check before each fire key press eliminates this error class almost entirely.
How do I cross-reference the spotter guide with the ballistic calculator?
Translate every spotter call into bearing and ring first, then feed those two values into the ballistic calculator input. This cross-referencing workflow ensures that the map-reading stage and the calculation stage stay synchronised, preventing the input errors that cause wild first-round misses.