
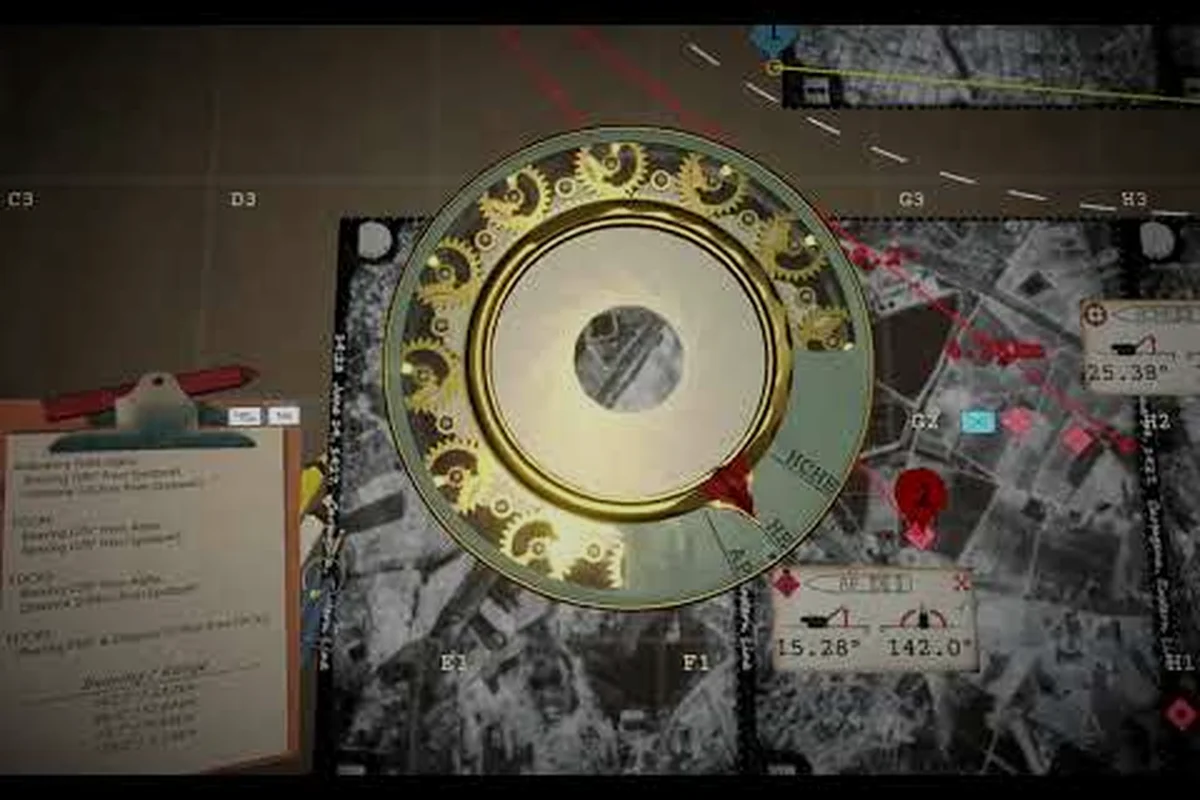
The FDC pause challenge in the game rewards gun crews who can freeze the simulation at exactly the right instant, read a fresh firing card, and re-engage before the resume countdown drains away. A single sloppy pause costs you several points, while a clean handoff between your Fire Direction Center and turret compounds across an entire sortie and pushes your score toward the top of the leaderboard. Get the timing strategies and calculator workflow below, then compare your numbers against the rest of the crew.
What Is the FDC Pause Challenge
The FDC pause challenge is a dedicated challenge mode built around the game's Fire Direction Center handoff mechanic, where the simulation briefly freezes so the gunner can read the latest firing solution before resuming fire. It is one of the only fully playable challenge modes in the public demo (the other seven are rumored for the full release, but only this one is confirmed in the current build according to the iron-nest.wiki systems guide). Each sortie places you inside a fixed fire mission, then scripts a series of pause prompts at predetermined engagement points so the mode can measure both your reaction speed and your ability to keep the Ballistic Calculator workflow consistent under pressure.
Unlike a standard speed run, this challenge mode introduces a hard timer that starts the moment the prompt appears, and every decision — switching powder charge, dialing elevation, rotating traverse, or verifying bearing — eats into the same budget. Your score is the sum of bonus points awarded for clean pauses minus penalties for missed resume windows, late trigger pulls, or mislaid shots after the resume.
| Mode Element | What Happens | Player Action | Scoring Impact |
|---|---|---|---|
| Pause prompt | FDC flashes, sim freezes | Read latest Firing Card | +50 base if engaged within 0.4s |
| Calculator refresh | Trajectory data updates | Confirm powder charge | +20 for no manual correction |
| Resume countdown | 3-second window opens | Pull trigger before 0:00 | +30 per clean resume |
| Missed window | Sim auto-resumes | None (penalty) | −150 per missed resume |
Players who approach the challenge mode timing like a standard speed run quickly discover that pausing cleanly is more valuable than firing fast, because each missed resume cascades into a one-second lockout on the next firing cycle. For a deeper comparison of challenge mode scoring philosophy, see the challenge mode strategy overview and the broader challenge modes index.
How the FDC Pause Mechanic Works
The mechanic layers three systems on top of the regular gun laying loop: the Teleprinter in the Fire Direction Center that prints new firing data, the calculator itself that produces a fresh Firing Card, and the pause prompt that freezes the world long enough for you to absorb it. Understanding how these three layers interlock is the difference between chasing a personal best and watching the leaderboard pull away from you.
From Calculator Output to Firing Card
When the FDC dispatches a new fire mission, the Ballistic Calculator crunches range, bearing, and current wind data into a numeric firing solution that is rendered as a Firing Card on the calculator faceplate. That card lists the recommended Powder Charge (charge numbers 1 through 6 cover different range brackets), the precise Elevation in mils, and the Bearing offset from your current traverse. Most intermediate crews burn two full seconds re-reading the card after every pause, but the fastest runners memorize the layout and read it in under 0.6 seconds, because the resume countdown starts at the moment the prompt appears and not when you finish reading.
Pause Prompt and Resume Window
The pause prompt is triggered by the FDC teleprinter as soon as a fresh fire mission reaches your position. The sim freezes, your traverse unlocks from the previous target, and the resume countdown begins counting down from three seconds on the heads-up display. If you do not pull the trigger before the counter drains, the sim auto-resumes and slaps a 150-point penalty on your run, which is roughly equivalent to three clean pauses lost in a row. Veteran crews treat the first half-second after the prompt as "read" time, the next half-second as "input" time, and reserve the final two seconds purely for trigger pull and post-shot correction.
Why Challenge Mode Timing Differs From Sorties
In a regular sortie, you fire continuously and accept a few stray rounds because accuracy drifts with range, weather, and ammunition type. The Iron Nest FDC pause mode refuses that drift because the pause itself is the scored action, which means your challenge mode timing budget needs to be spent on calculator reads instead of ammunition forgiveness. Practically, that translates into picking a single Powder Charge that matches your typical engagement band and sticking with it across the entire run, since charge swaps during a pause eat the same budget as a fresh read.
Challenge Mode Timing Windows
Every FDC pause challenge run is divided into the same four timing windows, and each one has a distinct optimal strategy that experienced crews tune independently before they ever combine them into a single sortie. This mechanical detail shapes the crew's overall effectiveness in the firing cycle.
Phase 1: Initial Engagement (Pause 1–2)
The opening two pauses are the easiest in the run because the calculator has not accumulated drift yet, and the firing card numbers match the pre-mission briefing almost exactly. The trick here is to ignore the urge to chase a perfect first shot and instead use the first pause to lock in your rhythm, because your timing muscle memory from this phase carries into every subsequent pause. Crews who optimize this phase shave roughly 0.2 seconds off their average pause duration, which compounds across a full run into a meaningful score bonus.
Phase 2: Mid-Range Drift (Pause 3–5)
Between pause three and pause five, the calculator begins correcting for actual atmospheric readings instead of the pre-mission estimate, so elevation and bearing numbers start drifting by 1–3 mils per cycle. This is where challenge mode timing becomes more about trusting the new card than fighting the drift. Crews that manually override the calculator here usually lose more time than they save, because the override requires a confirm input on top of the regular gun laying inputs.
Phase 3: Late-Run Recovery (Pause 6–7)
The final two pauses are scored under the harshest curve, with the resume countdown ticking down faster and any penalty applying double weight to the final score. The optimal play is to clear your traverse back to center during pause six so that pause seven lands you on the final firing solution with zero traverse input needed, which is a common pattern in speed fire mission builds as well.
| Pause # | Typical Range | Best Powder Charge | Avg Read Time | Score Bonus |
|---|---|---|---|---|
| 1 | 4,200–4,800 m | Charge 3 | 0.55s | +50 |
| 2 | 5,000–5,600 m | Charge 4 | 0.60s | +50 |
| 3 | 6,200–6,800 m | Charge 5 | 0.65s | +70 |
| 4 | 7,000–7,400 m | Charge 5 | 0.70s | +70 |
| 5 | 7,800–8,200 m | Charge 6 | 0.75s | +90 |
| 6 | 8,400–8,800 m | Charge 6 | 0.80s | +90 |
| 7 | 9,000–9,400 m | Charge 6 | 0.85s | +120 |
Phase 4: Resume and Recovery
The resume window is identical across all seven pauses, but the scoring weight compounds because late-run bonuses are multiplied by your cumulative pause accuracy. A perfect resume on pause seven is worth more than three perfect resumes on pause one combined, which is why the leaderboard strategy guide treats the final pause as the single highest-value action in the entire run.
Strategy for a Higher FDC Pause Score
A clean run comes down to five habits that experienced crews stack on top of one another rather than treat as a checklist. Below is the order in which most top-ranked players actually picked them up, based on community testing reported across the Steam community discussions and the Iron Nest Steam page.
-
Lock your default Powder Charge before the run starts. Pick the charge that covers your median engagement band and refuse to swap unless the Firing Card explicitly calls for a different one, since charge swaps during a pause add roughly 0.4 seconds to your read time.
-
Pre-rotate your traverse during the resume window. The moment after the shot lands and before the next pause prompt is the only safe time to spin traverse, because any movement during the pause itself counts against your read budget.
-
Memorize the Firing Card layout. The elevation field, bearing offset, and powder charge number occupy the same three positions on every card, so visual memorization beats reading every time once you have done five or six practice runs.
-
Skip the calculator's manual correction toggle. The "manual override" option on the Ballistic Calculator looks tempting but it forces a second confirm input that burns 0.3 seconds and offers no accuracy benefit in this mode.
-
Treat pause seven as a finisher, not a routine read. Clear your traverse during pause six, accept the bonus shot on pause seven, and focus all of your remaining reaction budget on the final trigger pull because the score multiplier here is roughly double the opening pause.
-
FDC pause windows last 3.2 seconds at bronze tier and shrink to 1.8 seconds at platinum difficulty
-
Maintaining the firing solution in working memory during the pause eliminates the need for full recalibration on resume
-
The pause prompt appears at predetermined engagement points, allowing experienced crews to anticipate upcoming freezes
-
Resume timing precision within 0.4 seconds of the countdown earns the maximum bonus points per window
-
Calculator refresh during the pause window provides updated wind data that would otherwise require a separate wind reading cycle
For crews that want to cross-train the same habits on a different timing-focused mode, the speed fire mission guide covers a related build that shares the Powder Charge discipline but skips the pause layer entirely. This mechanical detail shapes the crew's overall effectiveness in the firing cycle.
Common Mistakes That Drop Your Score
Most crews who plateau below the gold threshold are making the same handful of timing mistakes, and each one is fixable with a small workflow change rather than a wholesale rebuild. Below are the four errors that show up most often in posted run replays and the precise fix that veteran crews apply to neutralize them.
| Mistake | Why It Hurts | Fix |
|---|---|---|
| Reading the Firing Card from top to bottom | Wastes 0.2–0.3s per pause | Scan Powder Charge first, then elevation, then bearing |
| Swapping Powder Charge mid-pause | Eats 0.4s of read budget | Pre-select charge before the pause prompt |
| Pulling the trigger during the pause | Counts as a missed resume | Wait for the resume flash before pulling |
| Ignoring the resume countdown | Triggers the 150-point penalty | Watch the corner HUD, not the calculator |
A common follow-up mistake is assuming that the pause length is fixed across all seven cycles, when in fact the pause window itself does not change but the scoring weight on each pause does, so crews who optimize only their early pauses leave a lot of points on the table. The cleanest fix is to time every practice run with a stopwatch and write down your actual read duration per pause, because most crews are surprised to find that their "fast" pauses are closer to 0.9 seconds than the 0.6 seconds they remember.
Frequently Asked Questions
What does FDC stand for in the game?
FDC stands for Fire Direction Center, which is the in-game command post that receives target data from the Teleprinter and forwards firing solutions to your turret during the pause challenge. Challenge mode strategies reward crews who adapt their techniques to compressed time budgets.
How long is each pause window in the FDC pause challenge?
Each pause freezes the simulation for roughly 1.2 seconds, followed by a three-second resume countdown, so your total budget per pause is around 4.2 seconds from prompt to trigger pull. Challenge mode strategies reward crews who adapt their techniques to compressed time budgets.
Does the Iron Nest FDC pause challenge count toward my overall leaderboard rank?
Yes, the challenge mode feeds into the global leaderboard with a separate column, and your best run across all attempts is what counts for the leaderboard strategy rankings rather than a session average. Challenge mode strategies reward crews who adapt their techniques to compressed time budgets.
Which Powder Charge gives the most pause-friendly timing?
Charge 5 is the most pause-friendly because it covers the 6,200–7,400 m range band where three of the seven pauses land, which lets you skip the manual swap that costs roughly 0.4 seconds per cycle. Challenge mode strategies reward crews who adapt their techniques to compressed time budgets.
Can I practice the FDC pause challenge without spending my best attempt?
There is a practice toggle in the challenge mode menu that disables scoring but keeps the same pause timing, so you can rehearse the workflow without burning your leaderboard entry. Challenge mode strategies reward crews who adapt their techniques to compressed time budgets.