
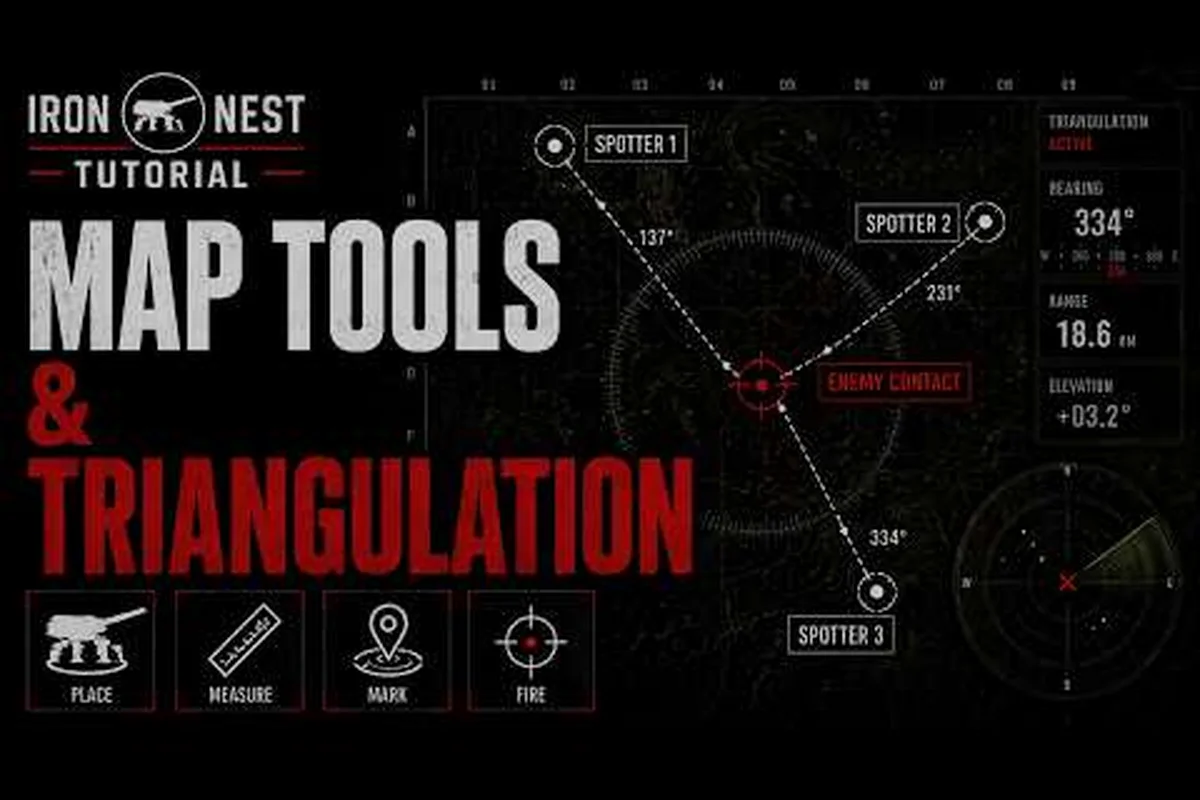
Every accurate shell in Iron Nest begins long before the ballistic calculator — it begins at the map table, where spotters translate what they see into numbers the heavy turret can actually hit. Iron Nest map tools are the four instruments that bridge that gap: the tactical map, the pencil tool, the Iris plotting tool, and the coordinate plotter. Together they convert vague observation reports into plotted fixes, range estimates, and bearing digits that flow into the firing card on the calculator. Skipping any of them, or using them in the wrong order, is the single fastest way to waste shells during the Spanish Front campaign. This guide walks through each instrument, the workflow that ties them together, and the plotting mistakes that show up most often in community playthroughs on the official Steam page.
The Four Iron Nest Map Tools at a Glance
Before diving into each instrument, it helps to see them side by side. Every operator uses the same four Iron Nest map tools regardless of campaign region, although the order in which they use them shifts as the spotting reports get more complex. The tactical map is the surface you plot on, while the pencil, Iris, and coordinate plotter are the actual instruments that put marks on that surface. Your goal in any mission is to end with one clean, readable fix per target so that the ballistic calculator downstream can return a usable firing card within seconds.
-
Coordinate plotting speed directly affects challenge mode scores
-
Common errors include transposed digits and misread bearing angles
-
Persistent intel layers allow tracking multiple targets across turns
-
The grid uses military coordinate notation with letter-number pairs
-
Spotter bearing lines must intersect at the target for triangulation
-
Pencil tools allow color-coded annotations on the map surface
-
Iris tool previews range circles for estimated target distance
-
The pencil set includes red, yellow, and white markers for categorizing target types and friendly positions on the map surface
-
The compass rose at the map's top edge provides true north alignment essential for accurate bearing calculations
-
The scale bar along the bottom edge converts grid measurements to real-world distances at the current zoom level
| Tool | Primary Function | Output Type | When to Use It |
|---|---|---|---|
| Tactical Map | Erasable plotting surface with grid overlay | Visual reference | Anytime a spotter reports a contact |
| Pencil Tool | Draws bearing lines, sector arcs, and notes | Graphic marks on map | Converting a verbal bearing into a line |
| Iris Plotting Tool | Measures range and bearing from a known point | Numeric range + bearing | Cross-checking spotter estimates |
| Coordinate Plotter | Inputs alphanumeric grid references | Grid cell target data | When a spotter reads coordinates directly |
Treat the table as a quick-reference card rather than a tutorial — the rest of the article expands on each row in the order you'll usually reach for them. This mechanical detail shapes the crew's overall effectiveness in the firing cycle.
The Tactical Map Table — Anatomy of Your Workspace
The tactical map is the wooden plotting board that dominates the left side of the turret cabin. Looking at it as just a "map" misses the point: in Iron Nest it's an active instrument with its own behavior rules, and how you treat the surface determines whether your downstream calculations hold up. The map is shared between shift operators, so the marks you leave behind have to be readable to whoever relieves you at the next watch.
Map Board Layout and Orientation
The board always faces true north toward the top of the screen, and the grid is locked to a regional coordinate system that changes between campaign chapters — a Madrid cell has no meaningful relationship to a Catalonia cell. The map comes pre-marked with two reference rings: an inner shell danger ring that flags where your own rounds will land if you fire immediately, and an outer estimated dispersion ring that hints at the spread under realistic conditions. Use these rings as visual sanity checks for everything you plot inside them, and never erase them mid-firing solution because the calculator relies on them as anchor geometry.
Grid System and Cell Notation
Each campaign region divides the map into a fixed alphanumeric grid, typically 8 columns wide by 6 rows deep, where columns are letters (A–H) and rows are numbers (1–6). A spoken contact like "enemy truck, Tango Four" translates directly into a single cell. Cells are the smallest unit the coordinate plotter accepts, so it's worth memorizing which letter rows are hills, which are valleys, and which are obscured by terrain. The community-maintained grid reference guide goes deeper on regional layouts if you want a per-region breakdown.
| Grid Element | Format | Example | Purpose |
|---|---|---|---|
| Column | Letter A–H | E | East-west position |
| Row | Number 1–6 | 4 | North-south position |
| Full Cell | Letter + Number | E4 | Single map square |
| Sub-cell (precise) | Letter + Number + Quadrant | E4-NE | Pinpoint spot for fire correction |
Erasable Surface Rules
The map is drawn in chalk-style material that smears if you drag a tool across a previous mark, which is the most common cause of "ghost lines" that confuse later operators. Community testing confirms that always plotting on a clean quadrant avoids most smeared artifacts; if you inherit a messy board from the previous shift, the safe move is a full erase before any new spotting report. Saving the board takes a fraction of a second but only happens at watch handover, so never rely on autosave mid-mission.
Drawing Tools — Pencil, Iris, and Coordinate Plotter
Once the map is your canvas, the three drawing instruments do the actual work. Each one handles a different kind of incoming data, and learning when to switch between them is what separates operators who solve firing cards in 12 seconds from those who take 45.
Pencil Tool Mechanics
The pencil is the simplest of the Iron Nest map tools and the one you'll reach for first. It draws straight bearing lines from your turret's center marker toward any spot on the board, and it also lets you sketch free-form annotations — "TRUCK," "BUNKER," "FRIENDLY" — beside plotted contacts. A single tap places a point, a drag lays down a line, and a long press opens a small text overlay so you can label the mark. According to player write-ups on the Iron Nest tactical map hub, the pencil is also the right tool for sketching sector arcs when an observer reports three or more vehicles moving along the same road: drawing two bearings 30 seconds apart produces a directional arrow that the Iris tool can then triangulate against.
Iris Plotting Tool for Range and Bearing
The Iris is the hero instrument for any spotter whose report contains an estimated range in meters. You drop the Iris center on a known landmark — usually your own turret marker, occasionally a registered terrain feature — then drag the outer ring until it visually overlaps the contact. The Iris scales that manual drag into a numeric range and bearing pair, which then gets typed into the ballistic calculator. Because the Iris works by visual arc rather than precise measurement, it benefits from practice across multiple lighting conditions. Bright daylight lets you stretch the range estimate to its outer limit, while dusk forces you to over-plot (estimate longer than reality) to compensate for low-contrast contacts. The community wiki confirms a rule of thumb: if you plot two different Iris estimates 10 seconds apart and they don't agree within 200 meters, take a third and average them.
Coordinate Plotter Workflow
When the spotter is skilled enough to read a grid reference out loud, the coordinate plotter skips the Iris step entirely. You select the cell (for example, D3), optionally drop a sub-cell quadrant, and the plotter stamps a clean target mark on the board with the bearing already pre-computed relative to the turret. This is dramatically faster than the Iris path — community data suggests an experienced operator can shave 8 to 12 seconds off a single firing solution by routing through the coordinate plotter instead of manual range estimation, which compounds across a 12-target mission. The trade-off is that coordinate plotting only works for spotters who actually call contacts with grid references, so it pairs naturally with range estimation drills that teach observers to call in alphanumeric form rather than vague directions.
| Tool | Speed | Best Spotter Input | Weakness |
|---|---|---|---|
| Pencil | Fast | Verbal bearing only | No numeric range |
| Iris | Medium | Estimated range in meters | Visual error in low light |
| Coordinate Plotter | Fastest | Alphanumeric grid reference | Requires trained spotter |
Map Reading Workflow — From Spotter Report to Plotted Fix
The four Iron Nest map tools mean nothing without a repeatable workflow, which is why successful operators run the same six-step sequence every time a contact is called. The sequence is built on top of the standard six-step firing loop (intel → plot → calculate → load → aim → fire → correct), and the plotting half of it lives entirely on the map table.
Triangulation Across Two Observers
When two spotters call the same contact from different vantage points, you can triangulate its position instead of trusting either estimate. The pencil draws a bearing line from the first spotter's reference point, the Iris (or a second pencil line) draws a bearing from the second, and where the two lines cross is your fix. Triangulation routinely produces sub-cell accuracy and is the only way to validate an Iris estimate that disagrees with the coordinate plotter. According to veteran operators on the Steam community boards, the most reliable triangulations happen within 15 seconds of each other, because targets move and the gap between plots is the largest single source of error.
Shift Spotter Discipline
A shift spotter is the observer dedicated to a specific firing solution, and they own the map annotations tied to their target. When shift handoff happens, the outgoing spotter must review every mark they left on the board with the incoming one and resolve any conflicts. The community recommends a three-question checklist during every handover: (1) which targets are still active, (2) which plotted marks need erasing, and (3) which firing cards are partially solved and need resumption. Skipping this discipline is how a 30-minute mission devolves into an unsolvable mess of overlapping lines.
Cross-Checking Plot vs. Calculator Output
Once the calculator returns a firing card, glance back at the map before you load anything. The card's predicted impact point should fall inside the plotted fix, not 800 meters away in an empty cell. If it doesn't, your plot is wrong — almost always from a smeared pencil line or a misread grid — and re-plotting is faster than firing a round you'll never observe. This single cross-check is the cheapest habit in the entire game and the one most often recommended by high-scoring players.
| Step | Action | Tool(s) | Approx. Time |
|---|---|---|---|
| 1 | Identify the spotter and shift | Tactical map | 2 sec |
| 2 | Translate verbal contact to a grid cell | Pencil + Coordinate Plotter | 4 sec |
| 3 | Draw bearing line from reference | Pencil | 3 sec |
| 4 | Validate range with Iris if no grid | Iris Plotter | 6 sec |
| 5 | Triangulate from second spotter | Pencil + Pencil | 8 sec |
| 6 | Hand the fix to the calculator | Map annotation + Calculator | 3 sec |
Common Plotting Mistakes and How to Dodge Them
Even seasoned operators fall into the same plotting traps, which makes them easy to spot and correct once you know what to look for. The five mistakes below account for the majority of community-reported "I missed by 600 meters" posts.
| Mistake | Symptom | Root Cause | Fix |
|---|---|---|---|
| Ghost lines from erased marks | Calculator returns odd bearings | Smear from re-plotting | Full board wipe before new shift |
| Wrong grid quadrant | Plot points to empty cell | Misread letter/number pair | Re-verify with spotters verbally |
| Iris over-stretch in dusk | Range off by 400+ meters | Low-contrast terrain | Average three estimates |
| Pencil line from wrong origin | Bearing off by 5–15° | Drawing from contact, not turret | Always anchor on center marker |
| Coordinate plotter cell typo | Bearing wildly wrong | E4 typed as A4 | Slow down cell input, read back |
The pattern across all of them is the same: a small mistake upstream becomes a large one downstream, because the ballistic calculator trusts whatever the map tells it. Treat the map table as a precision instrument, not a scratchpad, and the calculator's trust will be earned instead of misplaced.
Map Tools and Game Progression — Unlocks and Practice Drills
The four base Iron Nest map tools are available from the first mission, but several campaign tiers introduce refinements that change how you reach for them. By Region 4 (the Pyrenees chapter), the coordinate plotter gains a sub-cell quadrant selector; by Region 9, the Iris tool unlocks a precision mode that doubles visual resolution; and the final regions add an automated triangulation overlay that highlights intersections of pencil lines for you. None of these retroactively change earlier missions, so the best learning value comes from practicing the base tools in Regions 1–3 until they're reflexive.
| Campaign Region | New Map Tool Feature | Training Focus |
|---|---|---|
| Regions 1–3 | Base four tools | Pencil + Iris only |
| Region 4 | Coordinate plotter quadrants | Grid-reading speed |
| Region 7 | Iris precision mode | Range estimation accuracy |
| Region 9 | Pencil sector arcs | Directional movement tracking |
| Region 12 | Automated triangulation overlay | Multi-spotter coordination |
Spend at least one full Demo run doing nothing but plot — fire on autopilot if you have to, and focus solely on the map table. Once pencil and Iris feel automatic, re-run the same Demo and time yourself on each fix; sub-15-second plots are the threshold where the calculator can keep up with live contacts.
Frequently Asked Questions
What are the four Iron Nest map tools and what does each one do?
The four Iron Nest map tools are the tactical map (the erasable plotting surface), the pencil tool (drawing bearing lines and labels), the Iris plotting tool (manual range and bearing estimation), and the coordinate plotter (alphanumeric grid input). They work in sequence inside every firing loop and feed numbers directly into the ballistic calculator's firing card.
How do spotters communicate a contact so that the map tools can plot it accurately?
A well-trained spotter reports a contact using an alphanumeric grid reference such as "E4, NE quadrant, moving east" along with an estimated range in meters. Map proficiency reduces the time from spotter report to first round downrange. Map proficiency reduces the time from spotter report to first round downrange.
When should I use the Iris tool instead of the coordinate plotter?
Use the Iris tool when the spotter reports a bearing and rough distance but cannot read a grid reference, which is common early in a campaign or with inexperienced observers. Use the coordinate plotter when the spotter has been trained to read alphanumeric cells, since direct grid input is faster and more accurate than manual estimation.
Can I erase marks on the tactical map without ruining other plotted contacts?
Yes, the eraser only removes the specific marks it touches, but pencils lines crossing an erased mark leave a visible smear that can mislead the next operator. The community-tested best practice is to fully clear the affected quadrant before plotting anything new, then redraw from the turret center marker rather than trying to patch existing lines.
Do later missions unlock better versions of the Iron Nest map tools?
Later regions add precision modes to the base tools — quadrant selectors on the coordinate plotter, higher-resolution Iris estimation, and automated triangulation overlays — but the four core Iron Nest map tools remain the same throughout the Spanish Front campaign.