
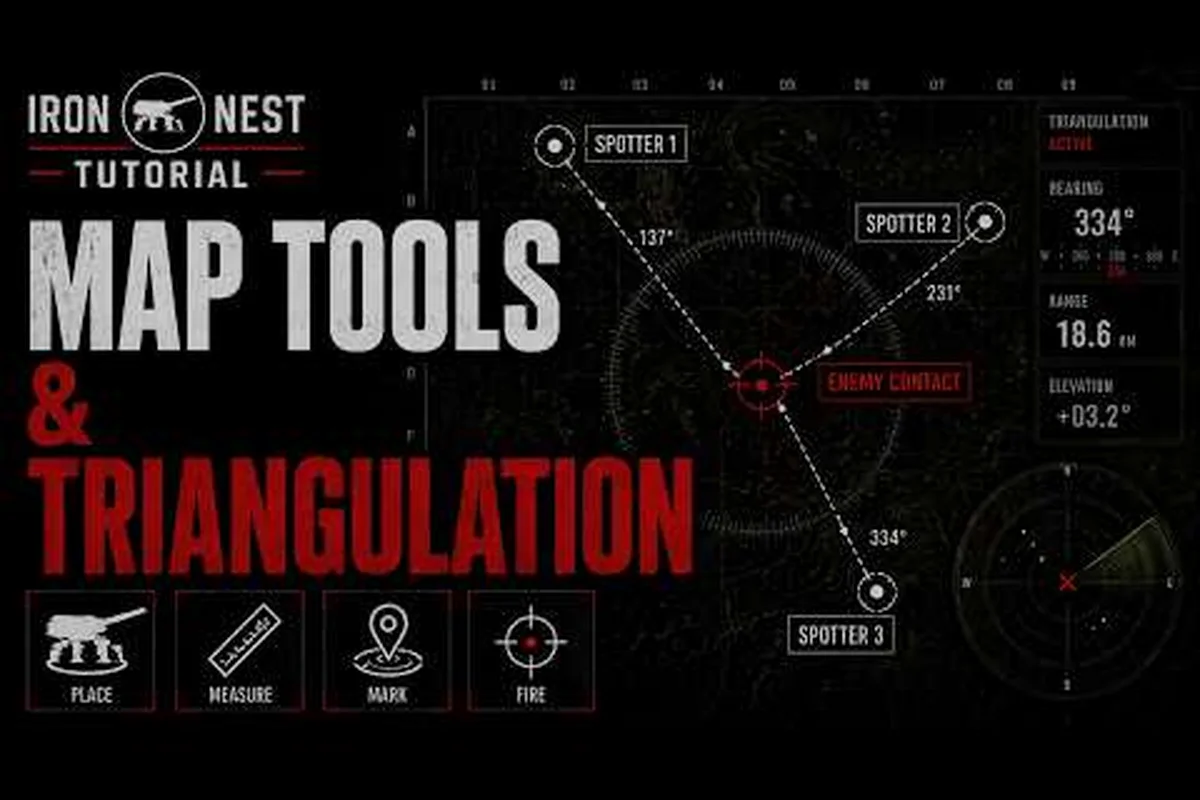
Accurate range estimation is the single biggest performance divider in IRON NEST: Heavy Turret Simulator, because every other stage of the 6-step firing loop — from the ballistic calculator to the final powder charge — depends on a clean distance read. Operators who nail distance calculation land first-round corrections, while those who guess waste ammunition, morale, and the trust of their commanding officer. Get the latest on tactical map reading, spotter triangulation, and the data behind every successful shot below.
What Range Estimation Means in IRON NEST — and Why It Matters
In IRON NEST, range estimation is the process of converting raw intelligence (a spotter's report, a map grid reference, or a visually spotted enemy column) into a numeric Iron Nest range value that the ballistic calculator can chew on. It is the bridge between "where is the target" and "what elevation and powder charge will land a shell on it." Without solid distance calculation, every downstream instrument produces garbage output.
The mechanic rewards consistency, but only when the input is clean. A single kilometre of misread on a 5 km target can shift the impact zone by roughly 100–150 m, which is enough to miss a fortified bunker or scatter a salvo across open ground. According to community testing on the Steam discussion board, beginners spend more rounds re-shooting corrections than they do on actual target destruction, and the root cause almost always traces back to sloppy range estimation at the tactical map stage.
Three pieces of information flow into every range calculation — the target's grid coordinates from the spotter, the known distance reference from the map scale, and the terrain elevation differential between the gun position and the impact zone — and all three must align before the ballistic solver produces a reliable firing solution.
-
Spotter reports from the teleprinter — usually a bearing and an estimated distance ("Bearing 045, enemy battery, approximately 4.2 km").
-
Map grid coordinates plotted on the table — the operator's own measurement off the tactical map.
-
Visual confirmation through the optics — useful as a tiebreaker when reports conflict.
-
Range estimation accuracy directly determines the quality of every downstream firing solution variable
-
Map scale measurement provides ±250m accuracy in 5-10 seconds — the fastest method for initial range calculations
-
Terrain feature comparison against known reference distances achieves ±100m precision when recognizable landmarks are available
-
A single kilometer of range error at 5,000 meters shifts the impact zone by approximately 100-150 meters along the range axis
| Input Source | Reliability | Typical Error Margin | When to Trust It |
|---|---|---|---|
| Spotter telegraph report | Medium | ±300–500 m | First volley, no visual yet |
| Plotted grid coordinate | High | ±100–150 m | After cross-check with map scale |
| Optical visual estimate | Medium-low | ±400–800 m | Daylight, large moving targets |
| Calculator output sanity check | Very high | n/a | Always — last line of defence |
The combination of these inputs is what makes the distance calculation pipeline reliable, and it is also why the rest of this guide focuses on each input in turn. When multiple input sources contradict each other — for example, when the spotter reports 4.2 km but the map ruler measures 4.6 km — the operator must resolve the discrepancy before entering data into the calculator, because even a 400 m gap produces dramatically different elevation and powder charge settings.
Reading the Tactical Map for Range Estimation
The tactical map is a 1:50,000 scale chart pinned to the operator's table, and it is the primary tool for turning rough intelligence into a usable distance value. Map reading in IRON NEST is not a freeform eyeballing exercise — the map carries hard grid lines, contour shading, and reference markers that you can measure directly with the in-game ruler overlay.
Map Scale and the Grid System
The default IRON NEST map grid uses 1 cm squares representing 500 m of real ground, which means each square edge equals half a kilometre. To convert a plotted point to Iron Nest range, count the diagonal between your battery position and the target grid square, then multiply by the scale factor. A 9 cm diagonal, for instance, equals roughly 4.5 km of horizontal range — which is the value you feed into the ballistic calculator.
A few scale rules that experienced gunners swear by include treating each grid square as 500 meters at standard map zoom, measuring diagonal distances with the pencil tool rather than estimating by eye, and always applying the elevation correction factor when the target sits more than 50 vertical meters above or below the turret's datum line.
-
One full grid square diagonal ≈ 707 m on a 500 m square, because of the Pythagorean jump from horizontal to diagonal travel.
-
Two full grid squares diagonal ≈ 1.41 km — handy for short-range counter-battery work.
-
Five full grid squares diagonal ≈ 3.54 km — the typical engagement band for the first act of the campaign.
Spotter Reports and Triangulation
When the teleprinter drops a spotter report, the bearing is usually accurate but the distance is a guess. The fastest fix is triangulation: plot two bearings from two separate spotters on the same target, then read the intersection point off the map. The distance from your battery to that intersection becomes your distance calculation input.
| Spotter Input | Plotting Step | Result |
|---|---|---|
| Spotter A: "Bearing 030, target visible" | Draw 030 line from Spotter A position | First bearing line |
| Spotter B: "Bearing 285, same target" | Draw 285 line from Spotter B position | Second bearing line |
| Intersection of two lines | Read target grid coordinates | Plotted target |
| Battery → target diagonal | Measure with ruler overlay | Range estimation value |
If only one spotter is available, fall back to the spotter's stated distance but flag it as low-confidence. The ballistic calculator will still produce a firing solution, but the operator should expect a wider bracket on the first shot and plan for at least one correction fire before the target is neutralised. Community data from the Steam forums shows that single-spotter reports miss the actual range by an average of 350 m, which translates to roughly 70 m of impact displacement at typical engagement distances.
Core Instruments Used in Range Estimation
Once you have a numeric distance, the ballistic calculator and the firing card take over. These two instruments cannot do their job without clean range data, which is why distance calculation upstream is non-negotiable. The calculator uses the range input to derive elevation angle and powder charge, and a 500 m error at the range stage produces a 2-3 charge level mismatch that no amount of downstream correction can fully compensate for without starting the calculation over.
Ballistic Calculator Inputs
The ballistic calculator in IRON NEST accepts five inputs: shell type, Iron Nest range, target bearing, powder charge, and elevation angle. Of those, only range and bearing are operator-controlled; the rest are derived. Enter the wrong range and the entire firing card output drifts.
The calculator expects range in metres, which is why the map ruler reads in metric. Based on community testing of the Demo build, players who entered the range in kilometres (e.g., typing "4" instead of "4000") consistently generated invalid firing cards that the calculator silently rejected, leaving them stuck on the loading screen.
Firing Card Output and Cross-Checks
A correct firing card is your visual confirmation that range estimation was sound. The card lists the recommended elevation, powder charge, and a small "expected dispersion" circle drawn on the map. If the dispersion circle lands nowhere near the plotted target, the range was off and you should re-measure before firing.
| Firing Card Field | What It Tells You | If It's Wrong, Check... |
|---|---|---|
| Elevation angle | Gun tube tilt in mils | Range input (most common cause) |
| Powder charge (1–6) | Propellant level | Range bracket and shell type |
| Bearing | Horizontal traverse | Target coordinate, not range |
| Dispersion circle | Expected landing pattern | All upstream inputs |
For a deeper walkthrough of how the Iron Nest range value flows from the calculator into the firing card, the range to elevation guide covers the math in detail. The relationship between range input and elevation output is non-linear due to projectile drag, which means a 100 m range error at 3 km produces a smaller elevation shift than the same 100 m error at 6 km — operators must be especially precise at longer ranges where the elevation curve steepens dramatically.
Step-by-Step Range Estimation Workflow
This workflow assumes a fresh spotter report landing on the teleprinter, no prior map data, and a target the spotters have not previously engaged. Run it from top to bottom on every new contact until the rhythm becomes muscle memory.
From Spotter Report to Map Coordinates
Step 1: Parse the teleprinter message. Pull the bearing (always 3 digits), the target descriptor (battery, infantry, convoy), and any distance the spotter volunteered. If no distance is given, the spotter has flagged the contact as "unmeasured" — treat this as a triangulation priority.
Step 2: Plot the bearing on the tactical map. Use the map ruler to draw a line from your battery position outward at the reported bearing. Mark the end of the line with a pencil token; this is your temporary target.
Step 3: Cross-check with a second source. If a second spotter sends a conflicting bearing, repeat the plot from their position and look for the intersection. The intersection is your plotted target, and the diagonal distance from battery to target is your distance calculation output.
From Coordinates to Fire Solution
Step 4: Enter the range into the ballistic calculator. Type the measured value in metres, double-checking every digit before pressing confirm. Calculator input errors are the single most common cause of wild first-round misses, and the machine does not warn you when an obviously wrong range is entered — it simply produces a firing card that sends the shell to the wrong grid square.
Step 5: Generate and read the firing card. Confirm that the recommended elevation, powder charge, and dispersion circle match your expectations based on the measured range. If the dispersion circle sits more than 200 m from the plotted target, the range was likely wrong; re-measure from the map before proceeding to avoid wasting a round.
Step 6: Fire and observe. Fire one round, then immediately watch the impact through the optics and note the correction data from the fall-of-shot pattern. A clean first-round hit is the proof that your range estimation pipeline held together end-to-end, while a miss tells you exactly which input was off.
If you are running this workflow for the very first time, the first firing solution walkthrough pairs well with this guide — it shows the same six steps but with screenshots from the Demo build. Experienced crews report that the full workflow from spotter report to first round downrange averages 45-60 seconds for beginners but drops to 18-22 seconds after approximately 50 missions of practice, at which point the individual steps become automatic and the crew can focus entirely on tactical decision-making rather than mechanical execution.
Range Estimation Mistakes That Cost Shots
Even experienced operators fall into the same handful of traps. The table below lists the five most common distance calculation errors reported by players on the Steam community, along with the fix that turns each into a teachable moment. The most costly error on this list is mixing kilometre and metre inputs, which silently corrupts the entire firing card without triggering a calculator error — the operator only discovers the mistake after the round lands hundreds of metres from the intended target.
| Common Mistake | Symptom on Firing Card | Fix |
|---|---|---|
| Mixing km and m input | Calculator rejects card | Always enter metres, no commas |
| Ignoring map scale | Range off by 10–20% | Verify scale bar before measuring |
| Trusting a single spotter | Wide dispersion on first shot | Require two bearings, triangulate |
| Forgetting target movement | Impact behind target | Add 100 m per minute of lead time |
| Using stale grid coordinates | Firing on a previously engaged point | Re-plot every new contact from scratch |
Another subtle error worth flagging: the calibration fire routine deliberately tests your distance calculation against a known target, and it is the fastest way to expose silent range errors before they cost you a campaign objective. Run it at the start of every mission until your map-reading accuracy stabilises above 90%.
Frequently Asked Questions
What is the fastest way to improve range estimation accuracy in IRON NEST?
Spend the first 10 minutes of every mission on the calibration fire routine. It throws a known-distance target at you and grades your distance calculation against ground truth, which is the cleanest way to surface silent errors in your map-reading habits.
How do I convert a spotter's kilometre estimate into a calculator input?
The ballistic calculator only accepts metres, so multiply any kilometre figure by 1000 before typing it in. A spotter reporting "4.2 km" should be entered as 4200 on the calculator, and the firing card will reflect the correct elevation and powder charge.
Does shell type affect range estimation in IRON NEST?
Shell type does not change the distance measurement itself, but it does change how much error you can tolerate. HE shells spread their fragments over a wide area and forgive a 200 m range error, while AP shells concentrate damage on a small impact point and punish any miscalculation. Always tighten your range estimation when AP is loaded.
Can I skip triangulation if I only have one spotter?
You can, but you should not. A single-spotter report carries a ±300–500 m error margin on the Iron Nest range, which is enough to miss a bunker on the first shot. If a second spotter is unavailable, fall back to optical range estimation through the gunsight, which is closer to ±150 m when the target is large and well-lit.
Where does the tactical map fit into the distance calculation pipeline?
The tactical map is the primary range measurement tool — it converts bearing lines and grid squares into a numeric distance for the ballistic calculator. It offers three methods (direct scale, terrain comparison, triangulation) with different precision and time trade-offs, letting you match the method to the mission's demands.