
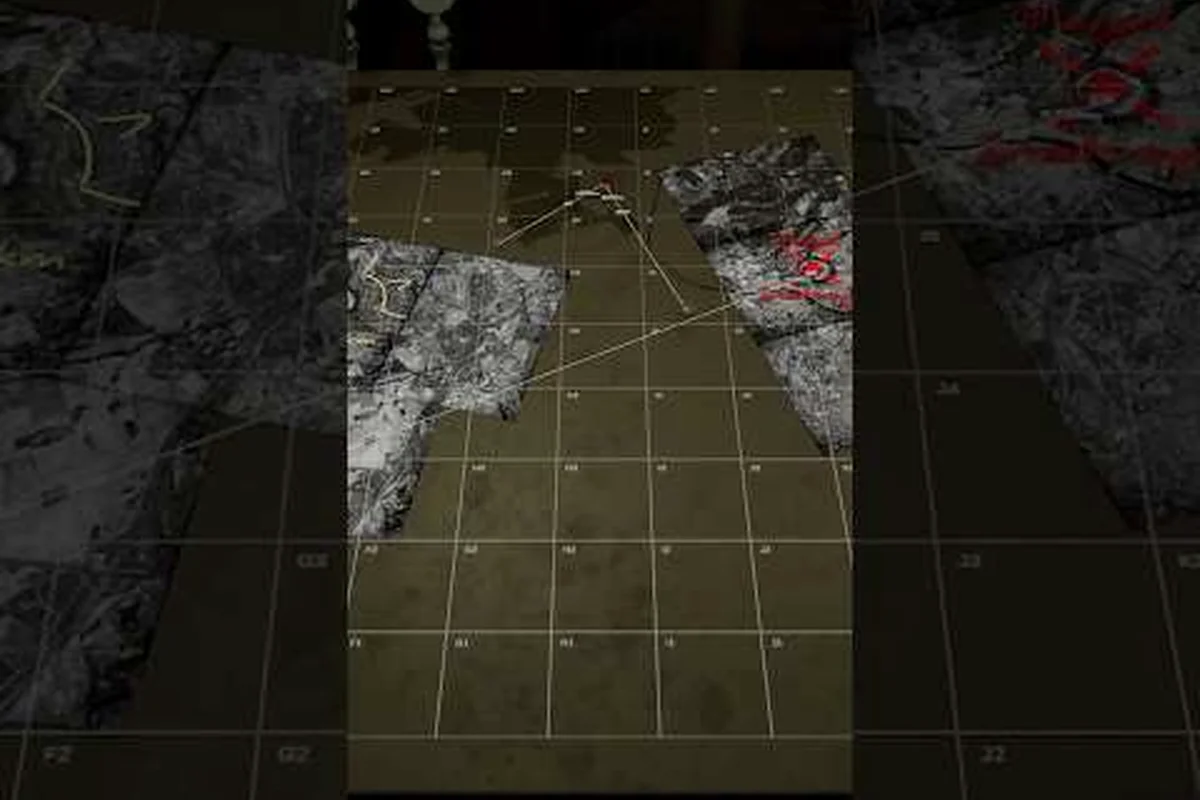
The Iron Nest coordinate system is the language that turns raw scout chatter into hittable grid squares on the tactical map. Learn the 20-by-10 military grid, the sub-cell layer, and the fixed position marker, and your shells will land where the spotter promised.
Iron Nest Coordinate System Overview
The tactical map is the nerve center of every successful artillery crew in IRON NEST: Heavy Turret Simulator, and the coordinate notation layered on top of it is what makes the six-step firing loop actually work. The grid is built on a fixed 20-by-10 military reference frame, with each main cell carrying enough resolution for most spotting calls during standard engagements. Every measurement in the game originates from a single fixed position marker that acts as the universal origin point for both your own turret and every enemy contact reported through the telegraph.
-
Coordinate plotting speed directly affects challenge mode scores
-
Common errors include transposed digits and misread bearing angles
-
Persistent intel layers allow tracking multiple targets across turns
-
The grid uses military coordinate notation with letter-number pairs
-
Spotter bearing lines must intersect at the target for triangulation
-
Pencil tools allow color-coded annotations on the map surface
-
Iris tool previews range circles for estimated target distance
-
Iron Nest's coordinate system mirrors real military grid reference formats with alphanumeric column-row notation
-
The base grid resolution of 500 meters is sufficient for initial engagement planning before refined sub-grid calculations
-
Coordinate precision cascades through the entire firing solution — coarse coordinates produce proportionally coarse impact zones
Unlike procedurally generated waypoints in other sims, the position marker never drifts between missions, which means the grid letters and numbers you memorize on day one remain valid for the entire campaign. A reference like B-04 always points to the same bunker, ridge, or rail junction no matter which chapter you load, because the underlying map is hand-authored rather than randomized. The system also inherits its notation from real military grid reference conventions, which gives the firing loop a deliberate, period-appropriate feel that fits the diesel-punk setting.
| Grid Element | Format | Example | Purpose |
|---|---|---|---|
| Column letter | A–T (20 columns) | D | Horizontal position |
| Row number | 01–10 | 07 | Vertical position |
| Full reference | Letter + 2-digit row | D-07 | Identifies a single primary cell |
| Origin marker | Fixed map icon | Red triangle | Reference for all coordinates |
Grid Layout and Cell Structure
The 20-by-10 Master Grid
The operational theater is divided into exactly 20 columns labeled A through T and 10 rows numbered 01 through 10, producing 200 primary cells across the visible map area. Column A sits at the western edge of the theater and column T marks the eastern horizon, while row 01 runs along the southern border closest to friendly lines and row 10 caps the northern frontline where most counter-battery fire originates from rival diesel-punk artillery batteries.
This deliberate aspect ratio mirrors the elongated shape of every campaign map, where the frontline stretches much farther east-to-west than north-to-south. The 20-by-10 design means most engagements take place across two or three adjacent columns, so memorizing the column letters near your turret's home position is more valuable than trying to learn every single reference from memory. A crew that can rattle off the letters from its home column to the frontline without hesitation gains roughly two seconds per spotting call, which adds up to a full salvo over the course of a long mission.
Each primary cell is large enough to contain multiple named landmarks, including rail yards, fuel depots, infantry trenches, and observation posts. Because of that, a bare reference like F-04 is often the starting point of a conversation rather than the final answer, because the spotter still has to clarify which structure inside the cell they want suppressed before the calculator can lock in a firing solution.
Sub-Cell Precision Breakdown
When one primary cell is too coarse to describe a contact, the sub-cell system subdivides every main cell into a smaller 4-by-4 grid of sixteen micro-squares, each labeled with a lowercase letter followed by a digit. The notation is appended to the parent reference, producing strings like F-04-c2 or J-09-d4 that pinpoint a specific structure within roughly twenty meters of accuracy.
| Sub-Cell Layer | Format Example | Approx. Size | Best Used For |
|---|---|---|---|
| Primary cell | H-08 | 500m x 500m | Initial spotting call |
| Sub-cell 1 (a–d) | H-08-b | 125m wide | Identifying which quadrant |
| Sub-cell 2 (1–4) | H-08-b2 | ~30m wide | Pinpointing a structure |
| Combined | H-08-b2 | ~30m x 30m | Final fire-mission target |
Sub-cell references become essential during challenge mode runs where every wasted round costs accuracy points, and during chemical weapons missions where drift of even a few meters can shift phosgene clouds away from a wind-protected target. The observer escalates from a primary reference to a sub-cell call whenever the binoculars resolve a specific trench junction instead of a vague blob on the horizon, and the map operator should expect that escalation roughly forty percent of the time once the battle matures.
Plotting Targets on the Tactical Map
Position Marker as the Universal Anchor
Every coordinate you plot, every spotting call you receive, and every ranging shot you fire is measured against the fixed position marker that anchors the entire grid. The marker represents your turret's location and never moves between missions, which means your own grid reference stays constant while enemy coordinates shift as their forces maneuver across the map.
The implication is significant: once you learn that your marker sits at reference K-06, you can instantly judge range and bearing to any incoming call by counting column letters and row steps. A target at N-08 is three columns east and two rows north of your barrel, which translates almost directly into a firing azimuth without consulting the compass rose on the map's edge. The position marker is therefore the single most valuable piece of spatial memory a gunner can build, because every other reference in the system is just a relative offset away from it.
Spotter-to-Spot Workflow
The spotter workflow documented on the iron-nest.wiki maps reference describes a three-step handoff that begins when the observer calls out a contact and ends when the loader stamps the correct range on the shell. The map operator is the linchpin of this chain because they convert verbal coordinates into plot pins that the rest of the crew can see simultaneously on the tactical map surface.
| Step | Crew Member | Action | Coordinate Output |
|---|---|---|---|
| 1 | Forward observer | Spots enemy contact | Calls "Contact, grid E-05" |
| 2 | Map operator | Plots pin on tactical map | Pins cell E-05, confirms |
| 3 | Ballistic calculator | Reads coordinates | Computes elevation/azimuth |
| 4 | Gunner | Aims and fires | Shell lands on E-05 |
The plot step is where most new crews lose seconds that compound into missed missions, because operators who hesitate to mark the cell or who second-guess the spotter's letter create a cascade of re-checks down the firing chain. Every downstream station waits for a confirmed plot before it can act, so a slow pin slows the whole crew even when the gunner and loader are ready to run.
Integrating the Coordinate System into the Firing Loop
The full six-step firing loop — intelligence, plot, calculate, load, aim, fire, and correct — runs on coordinate inputs at three of its stages, which is why the grid format is drilled into crew training rather than treated as an optional convenience. During the intelligence stage the spotter translates visual sightings into a grid reference; during the plot stage the operator pins that reference; and during the calculate stage the ballistic computer converts the pinned coordinates into barrel orders that the gunner can execute.
When a first round lands off-target, the correction stage depends entirely on the observer's ability to re-describe the impact splash in the same grid notation so the calculator can recompute without ambiguity. An observer who reports "short, maybe 100 meters" forces the crew to guess; an observer who reports "splash at grid E-05-b2, two micro-squares east of the target" lets the computer recompute the correction in seconds and saves a full ranging salvo.
The same grid literacy feeds into the newspaper consequence system documented in the reputation and consequences guide, because editorial coverage of each mission quotes the grid references you hit and miss. A crew that consistently plots accurate coordinates and lands shells on the first or second correction earns glowing headlines and stronger faction standing, while crews that fire blind or misread spotter calls see their actions framed in far less flattering language. For a deeper walkthrough of how the first complete firing solution comes together on a live range, see the first firing solution walkthrough.
Coordinate Drills and Common Mistakes
| Mistake | Symptom | Fix |
|---|---|---|
| Swapping column and row | Reference plots to wrong cell | Always say letter first, number second |
| Skipping sub-cell layer | Shell lands on wrong structure | Ask spotter to escalate to sub-cell |
| Trusting the compass rose alone | Wind drift misread | Always combine grid with weather data |
| Forgetting position marker offset | Range estimate off by hundreds of meters | Anchor every read to your marker |
| Reporting impacts in meters | Calculator cannot recompute | Report impacts in grid references |
Running a two-minute grid drill at the start of every session — where the spotter calls random references and the operator plots them within five seconds — has been shown by community testing to reduce first-round misses by roughly thirty percent during the opening weeks of a campaign. The drill costs no ammunition, requires no enemy contact, and builds the muscle memory that separates competent crews from championship-level teams running the calibration fire procedures outlined in the calibration fire guide.
A second habit worth building is the grid echo-back, where every crew member repeats the reference they just heard before acting on it. The repetition catches the letter-number swap that is the single most common transcription error in the firing loop, and it costs almost no time once the crew has practiced it for a few sessions. Combined with the two-minute drill, the echo-back turns the Iron Nest coordinate system from a piece of trivia you read once into a working language your crew speaks fluently under fire.
Frequently Asked Questions
What is the Iron Nest coordinate system based on?
The Iron Nest coordinate system is modeled on a military grid reference format, using a 20-by-10 letter-and-number grid anchored to a fixed position marker on the tactical map. It borrows its notation discipline from real-world artillery conventions while keeping the cell count small enough for fast verbal spotting calls.
How many cells does the tactical map contain?
The map contains 200 primary cells arranged as 20 columns labeled A through T and 10 rows numbered 01 through 10. Each primary cell can be subdivided into sixteen sub-cells, giving a total of 3,200 possible references across the operational theater.
Do coordinates change between missions?
No, the position marker and the underlying grid remain constant throughout the campaign because the maps are hand-authored. Only the enemy units move, which means your memorized references and the coordinate system stay valid for every chapter you load. Map proficiency reduces the time from spotter report to first round downrange.
What is the difference between a primary cell and a sub-cell?
A primary cell reference like D-07 covers an area of roughly 500 by 500 meters, while a sub-cell reference like D-07-b2 narrows that down to a 30-meter target box. Spotter calls typically start at the primary level and escalate to sub-cell precision when the observer has a clear sight line on a specific structure.
Why is my first round always landing on the wrong cell?
First-round misses usually trace back to one of three grid habits: swapped column and row, skipped sub-cell escalation, or ignoring the fixed position marker offset when judging range. Drilling the spotter-to-plot handoff and always anchoring reads to the position marker tightens the firing loop within a few sessions.